Home > Other Management tasks > Create landing page
Create landing page
For certain registration situations, you may need or desire to present your attendees with a single page that can direct a user to multiple individual events. Of course you can do this quite easily if you have your own web site and the capability to accomplish this.
You may also do it by creating what we call a 'Landing Page'. This is a special event that has only a single page - (identical to the Layout page). The single page will have an event code of its own so you can insert the event link into your web site or in an email.
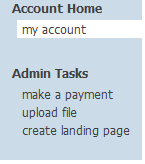
You can access the Landing Page facility by clicking on the my account link in the upper left corner of your screen. You will see this display on the left panel:
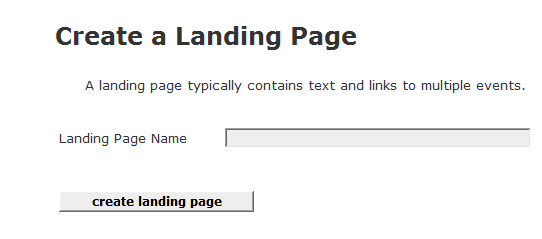
Click the create landing page link and you will be asked for the name of your Landing Page:
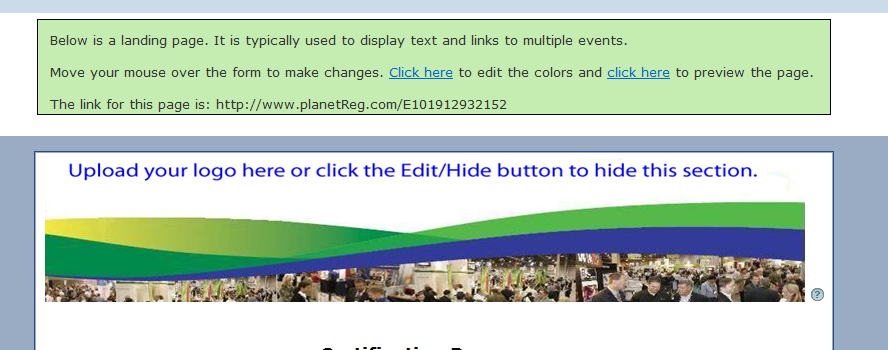
Once the page is created you will be presented with a single page/ form with some of the functionlaity of the normal 'Layout' page. You will not see registration types and only a single text input area. You can upload your logo or hide that section, you can enter when and where data if applicable, or just hide them.
The text below will show you how to create a landing page that is suitable for most purposes, however please check out:
Dynamic event display on landing page
Which provides an alternate method of inserting links on your landing page. It is especially appropriate for users who have repeating / periodic events.
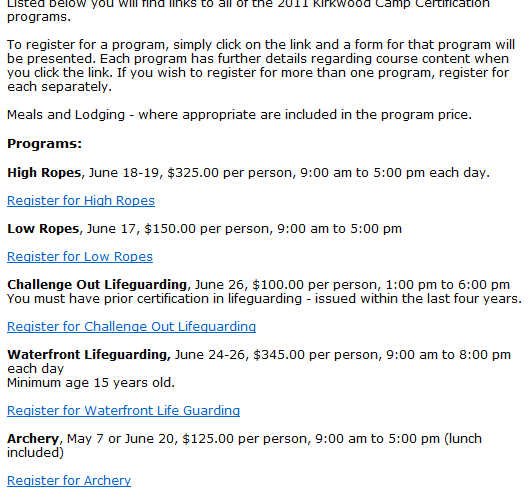
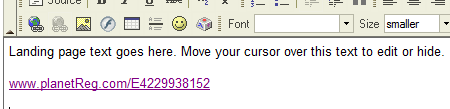
Your next task is to insert text and links to the events you are supporting - a typical landing text might look like this. In this case we have a summer camp with several opportunities for staff to qualify for specialized training:
All of the text and links are inserted into the single text area of the form:

The underlined / blue text represent links to your list of events. To insert a link into your text, you can use the link icon in the Edit text commands:

That is the small globe with a chain link under it.
When you click that icon, you will be presented with a dialogue that allows you to insert the link to your event. The link you need is available on the Dashboard of each event:

The link dialogue looks like this:
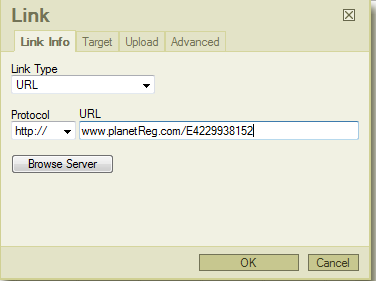
You will note that the pasted link does not include the http:// part.
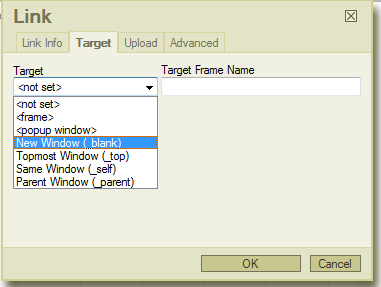
After entering the event link, click on the Target tab and ask to open the link in a New Window:
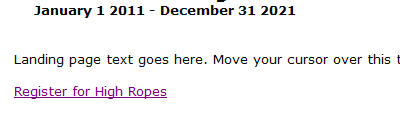
When you click OK, you will see the link shown in blue and underlined:
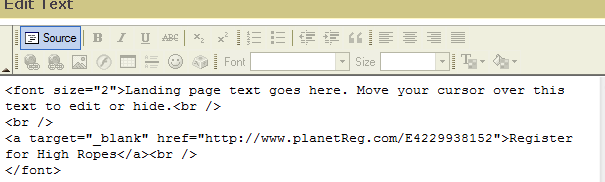
You may wish to change the raw link into something easier to read an understand. You can do that by clicking on the Source link for the text box. When you click the Source tab, you will expose the html code of the text:
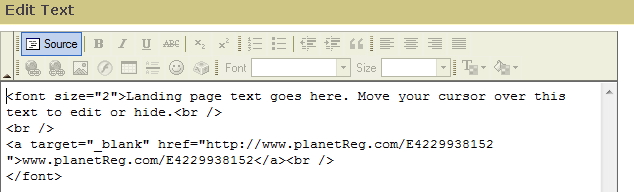
You can change the text displayed by the link by changing the data between the brackets >...< to look like this:
Now your text will look like this (click the Source link to return to normal mode):
See also