You will note that you can change the description for the Reg type columns. If you hover over the Reg type box, you will see an Edit button:

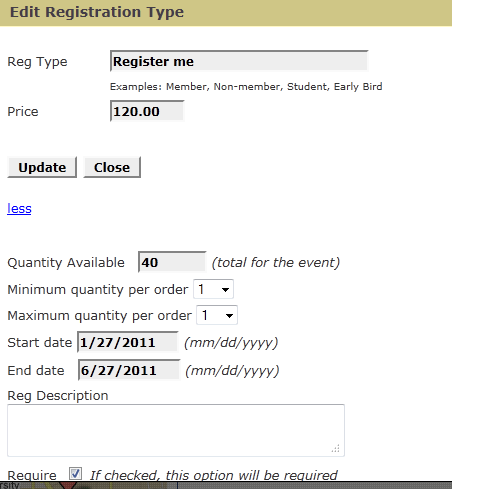
When you click the edit button, you will get this data entry screen:
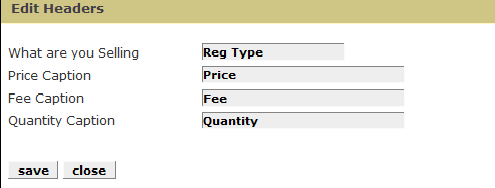
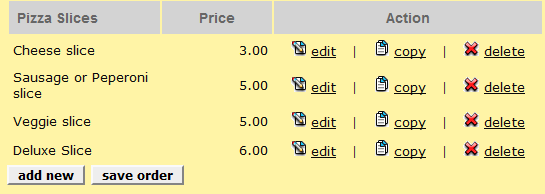
The caption says 'what are you Selling' and this is relevant when you use the system to sell tickets or items. For an example, see the Pizza Party explanation below.
If you are registering people, you will want to just leave the captions as is.
The system has two basic entry formats:
1. I want to register people and I need information on each registrant.
2. I am selling something that does not require me to register individuals. I just need a single contact or person.
When we get to the Edit Questions screen, expose the show hints section and the Click here to control who should answer these questions:

For type 1. registrations, just leave the button (all attendees) selected. If you are doing a type 2. registration form, select the (only attendee that is paying) button.
When using type 1., the program will ask for details for as many people as the attendee indicates on the registration type choice. The best way to understand this distinction is to try the sample registrations - try the Abercrombie Family Reunion for type 1., try the Lincoln School Pizza party for type 2. See Collect info for one registrant only
As an example, we will walk through setting up the Abercrombie Family Reunion registration.
In the case of the Reunion, we need to register adults and children. You can enter the first first registration type by just editing the dummy entry and changing the values to reflect your own registration needs:
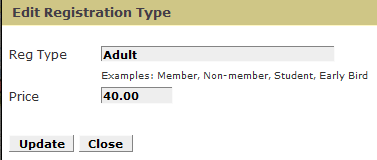
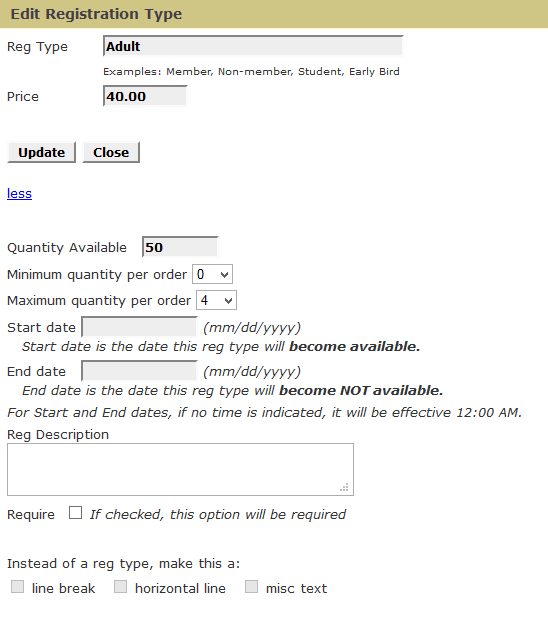
For our example, we have entered the Adult registration type and entered the price for an Adult.
As on many of the data entry screens used to set up your registration form, the Edit Registration Type has a more link. These links bring up further options, these are the additional options for registration type:
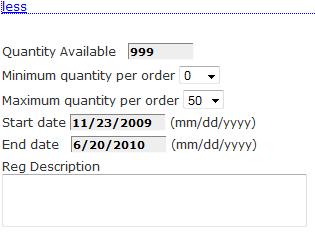
You can indicate a quantity limit if what you are selling has limits; for example, seats to a seminar.
See Setting overall inventory if you have a need for multiple registration types, but require a limit on capacity.
You can also indicate start and end dates for each item. You would use this option if you had a different price for early registrants (Early Bird Rate). The item is only available between the start and end dates shown. Although there is no time field present you can add a time by placing a single space after the date and a single space between the AM/PM designation - like (Date) 4:00 PM
If you want to provide a further explanation of a Reg Type, you can enter the explanation in the Reg Description box. This description will display when your attendee cursors over the
 symbol adjacent to the reg type.
If you require a minimum quantity or want to impose a maximum that can be ordered, you can set the Minimum and Maximum here.
You can add as many registration types as you wish. Just click the add new button to add another Reg Type.
You can also re order the registration type list. Just click the left button of your mouse and drag the item to a new position. When you are done, click the save order button.
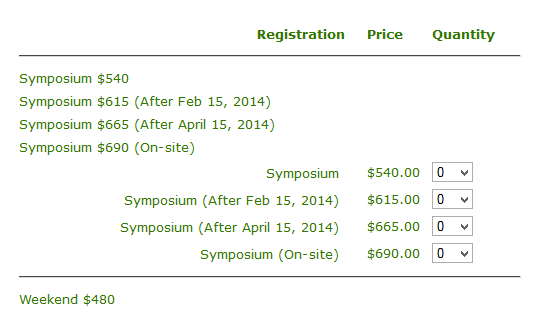
Your new Reg Type list might look like this:

This Video, demonstrates a type 1 event. I need to collect data on all attendees and want to enter multiple people on the same registration:

